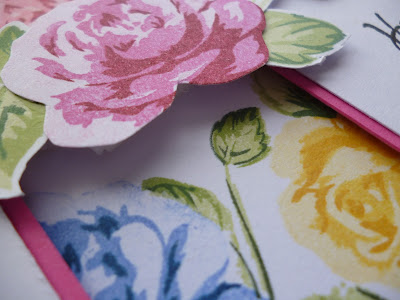
Free background from VintageMadeForYou

Friday 25 March 2016

Altenew Vintage Roses Panel Card

Another card made with this lovely stamp set.

I got my inspirations from a card I saw on Pinterest, that I thought was really lovely, with a clean and simple look, but really showed off the floral design.  It was by a lady called Jules from her blog 'handcraftedbyjules.blogspot.com, and was for a DT card for STAMPlorations, so I give her full credit for the design of this card


I simply stamped a left over piece of card with a range of the roses and leaves from the Altenew Vintage Roses stamp set, in a range of colours and adhered it flat to the card base.  I then cut a couple of top panels to fit either side of the panel, glued a thin strip of pink card down the inside edge of each, adhered them to some fun foam and onto the front of the card.  I stamped another flower and leaves on to another piece of scrap card, fussy cut them out and mounted them with foam tape.


I ended up having to do the flower centre  with 3 layers of foam tape, I only had a thin foam tape, and the leaves are on a single layer, so it sat lat over the recessed panel part. Then just a sentiment  by the flower to finish it off.  

Thursday 24 March 2016

Purple Vintage Roses card

I have finally managed to finish a card using the Altenew Vintage Roses Stamp set. It isn't perfect, as some of the flowers and leaves aren't perfectly lined up, but it has still made a very pretty card I think.  


I had a few issues with making this card, because of its construction, I stamped the roses and leaves on a die cut stitched circle, and made some of the stamps go off the die cut.  I then placed it on where it was going to go on my card base,  and matched up the stamps of the one rose and 3 leaf stamps and stamped them onto the base.  I used a home-made stamp-a-ma-jig, so that I could line up where the stamp was to go.  

However, I ended up having to make 3 of the backgrounds and almost had to do the circle part again.  It really wasn't my day!  The first card base, I somehow completely misjudged the top layer stamp of the wee two flower stamp at the top right hand corner, and it turned out about 5mm below where the base stamp was....ahhhggg!  So I started again and got to the stage where I was almost finished and dropped one of the ink cubes I was using onto the lovely clean area below all the stamping!!!!  So I started it again for the third time!

I almost had to start the circle die again.  I was just finishing my last purple rose at the bottom, and dropped a ink cube just below it, and nearly cried!!!  With some quick work, I was able to clean off some of the ink with a baby wipe, put it aside until it dried, as I wasn't sure how the card was going to look, as it had started to pill slightly, and I hadn't got all the ink off.  When it dried, it didn't look too bad, so decided to stamp a leaf over the area, and luckily it didn't show too much.  Catastrophe averted!!

The colours of inks I have used for the flowers is the Adirondack Denim ink for the darkest, a little cube of purple pigment ink, I bought a set of purples and mauve's ages ago, but can't remember the brand, and they don't have it on them, for the next layer.  The middle layer was a Versa color cube called violet, and the lightest layer is another one from the cube set that I don't know the brand of.  I would like to get one of the Altenew purple sets of mini cubes, but with the last 3 orders lately, I better wait a while to get that.
The greens are done with the Altenew Green fields mini ink pad set. 

I mounted the stitched circle die cut onto fun foam, and then mounted it onto the card base, matching the design on the bottom.  A few of the pretty pink posh 4mm droplets to finish it off. 
   

This is a close up of the roses and leaves in the circle die part.  Some of the leaves, despite using the stamp-a-ma-jig, still weren't lined up perfectly, but it will have to do.  Hopefully with more practice, I will get better at that.  I was wondering if it would be easier with a Misti stamping tool, but I just can't afford one, the exchange rate and postage is just so expensive to get it to New Zealand. Oh well I am sure I will get better at it.  

I decided at this point, not to do a sentiment on the card, as I think I could use it for a variety of occasions, such as Birthday, Sympathy, Thank you or Mother's day or anything like that, so I will put it aside, and put the sentiment on it once I decide to use it. 

I love love love this stamp set, so I have another few ideas of how to use it for some cards, so will post them when I have done them.   

Saturday 19 March 2016

Peony scroll simple and fancy

I have made two more cards with the Altenew Peony Scroll stamp set. One is very clean and simple, and the other is a little more fancy.  

For both cards I stamped the flower stamp and selection of leaves onto Tim Holtz water colour paper with vesamark ink and embossed them in Ranger white embossing powder.  I then water coloured them with my Stabilo 68 pens and a watercolor brush.  


This one I very simply embossed a stitched square die onto a piece of card, and then cut it so it was 5mm smaller all around than my card base.  I had the hello sentiment hanging around from quite a while ago when I cut some sentiments out on my silhouette cameo, but you could use any die cut for it and you can have it say anything really.  I then mounted some leaves behind the flower, and mounted it all with some foam tape and then mounted it into the corner of the stitched square impression.  


The close up of the stitched square, as it wasn't very easy to see it in the first photograph.  It is a very simple and quick card to do.  


This one I cut 2 stitched rectangles out of card and one into the centre of a card base.

I mounted a die cut of the Taylored expressions Circles cutting plate onto the inside of the card base with the right side of the die facing out to the front.  I then adhered one of the negative pieces of the stitched rectangle die cuts over this matching the stitched border and trimmed it to the card base.  This was to neaten up the inside of the card.  The last negative die cut I trimmed to be 5mm narrower all the way around than the card base, mounted it onto fun foam and stuck it to the front of the card base, again matching up the stitched border.  

I cut two stitched cloud border pieces out of vellum, and then cut the edges with the stitched rectangle die again to match the front of the stitched rectangle window and mounted it with some clear matt glue to the stitched edge on the top left and bottom right edges of the window.  The sentiment is the Happy Birthday from the Altenew Persian Motifs stamp set.


With the flowers for this card, I actually did 3 stamps for each flower of the bottom ones, and two stamps for the top one.  I coloured one of the stamps for each flower in fully, then for the second and third layers for the bottom two flowers, and one layer for the top flower, I only coloured in the central parts and cut them out and mounted them with foam tape so they are dimensional.  I hope you can see the dimension in the photo, it looks great in real life.  Finally they were mounted flush to the card so they overlapped the vellum slightly.

Wednesday 16 March 2016

More Altenew lacy scroll cards

I have done another couple of cards with the Altenew Lacy scroll stamps.

This time I have stamped them with ink and then coloured some shading and definition of the petals with a mixture of coloured pencils and or alcohol markers.


This first one I stamped the solid stamp of the main flower with a versa color pigment ink in mauve, and then coloured the shadows on the petals with a mixture of alcohol markers and pencils. I made a card topper with some white card, which I sponged on some of the mauve ink with a blending tool so that it just peaked out from behind a doily I cut with a couture creations doily die. I mounted the topper onto a purple mat and then onto a card base.  
The doily I mounted onto fun foam, so that it gave shadows onto the background.  The next layer is a vellum circle cut out with a stitched circle die, and then a smaller stitched circle die to cut out the circle for the sentiment, which again was mounted on some fun foam.  
Finally the flowers that I had fussy cut and mounted on foam and arranged around the doily.  A few sequins in white and iridescent mauve to finish it off.


The next card, turned out a little bit different than I had in my head.  I think it was mainly down to the fact that the smaller stitched rectangle dies I had (Simon Says Stamp) where narrower than I was looking for, so the card ended up narrow and tall.  
I stamped a wood grain stamp onto vellum and embossed it with Ranger white embossing powder and cut them out with the No 2 die in the stitched rectangle die set.  I stuck them down to the card base with tape runner and luckily it doesn't show on the front.  I stamped the lacy scroll flower stamp with altenew cotton candy dye ink and then coloured this one in with alcohol markers.  The leaves I stamped with shabby shutters and then coloured them with alcohol markers too.  I stuck the leaves to the back of the cut out flower, and then put some foam tape on the back.  I did a messy nest of gold thread and stuck the flower onto the card over the messy thread, so that it stuck it down to the card.  Finally a couple of shades of pink and white  iridescent sequins to finish it off.  The sentiment is a hero arts rubber stamp with versafine black ink.


The next cards I am going to make is some with the peony scroll stamp set I think.  I am still waiting on some green inks to come from altenew before I can do the Vintage rose cards I want to do.  I already have some ideas of layouts for that so I will be ready to go when they arrive in the next few days.  

Saturday 12 March 2016

Distress inked scene cards


I have been having a play with distress inks and a couple of grassy stamps I have, seeing if I could come up with a few cards that would be suitable to giving to some males in my family, my brother's birthday is coming up next month, then I have a brother-n-law and also my daughter's boyfriend to do later in the year.  

I really enjoyed the process of masking and then the reveal after I had done the inking.  Such a thrill!


This one I cut a square out of some masking paper and stuck it onto a piece of card.  I then put a circle mask down where I wanted the sun to go, and then a strip of post-it across the lower middle, so I could work on the sky.  I have used dusty concord and salty ocean blended together for the sky. I then stuck down the negative piece of masking that I cut the circle for the sun out of, took off the sun mask and then inked the sun with squeezed lemonade and mustard seed.  Then I took off all the masks except the outside one, and i put the post it on the top section to cover where I had just masked, and did the see with tumbled glass and a little of the squeezed lemonade to make the reflection of the sun in the water.  Lastly I stamped the Inkadinkadoo grass stamp with versafine black ink.  Then I peeled off the outside mask to reveal the scene.  I cut out the topper with a stitched rectangle frame and mounted it to a card base.


These last two I made in the same way, but used slightly different colours for the hills. The panel is made on the card base, but this time I just put some post-it strips the full length of the card leaving a strip in the middle for the scene.  The sky is done exactly the same as the top one but I free hand cut out some hill shapes.  This time I used some tree stamps for the top one and two grasses for the bottom one.  The sentiment on all three cards the same is the Happy Birthday sentiment from the Altenew Persian motifs stamp set.   

Wednesday 9 March 2016

Altenew Lacy Scroll cards


I have loved the Altenew stamps for quite some time, and I had bought two stamp sets of theirs previously, the Persian motifs, and the vintage roses.  I love them, I have used the Persian motifs quite a lot but haven't used the Vintage roses very much, as I really didn't have many coloured stamp pads, and only owned two dye ink pads, the rest a pigment inks.

I have been really enjoying watching videos and seeing some very cool cards on Pinterest, and decided I really need to get back into doing more stamping.  I have been doing a lot of cards using die cuts, and paper flowers, but I really want to do some more stamping.  
So... I decided to buy a couple more stamps, and of course they have to be Altenew stamps, and it isn't cheap to buy stamps from America, by the time you pay for postage and convert New Zealand dollars into US$, so I thought while I was ordering these, I would order some of the Altenew Crisp ink mini ink pads.  So I did, they have arrived, and so I have been practicing doing the Vintage roses with the ink pads, I will do some cards with the results shortly, but I have also been having a play with one of the stamp sets I bought, Lacy scrolls.  

I saw a wonderful video from Therese Calvird who has a blog called Lostinpaper. She did a gorgeous card using the lacy scroll stamp set and then used coloured pencils to give the flower dimension.  I thought I would like to give it a go, so I made one the same colour as she did, using the Altenew crisp ink Mango smoothie, and then I had a go at doing a pink version with Cotton Candy crisp ink.  


This first card I made a top panel, slightly narrower than the card base,  I cut out an aperture with a stitched circle die.  I stamped the Happy birthday sentiment. I placed the top panel where I would eventually have it on the card base, and glued the die cut into the aperture, and took away the top panel.  I then glued a couple of the flowers onto the die cut. I put a strip of gold glitter tape along the left hand edge of the card base.  To the top panel, I put a thin strip of black gloss card along the back of the panel, along the left edge, with a little bit showing from the front, mounted this panel onto some fun foam, and mounted it onto the card base, making sure that it matched perfectly with the die cut, so that it looks recessed.I mounted the main flower onto the top panel with some fun foam, and tucked some of the leaves around it, then glued a few flat back pearls around.


This card I made a front panel about 5mm smaller all around from the card base.  I sponged a Moroccan stencil design onto the panel with a subtle shading of Spun Sugar and Squeezed lemonade Distress inks.  I mounted this onto some fun foam and then onto the card base.  I glued two of the flowers to the top panel, tucked some leaves around them, then mounted the third flower to some fun foam and then onto the middle of the glued flowers.  I stamped the sentiment onto black card with Ranger white embossing powder, cut a fish tale in one end and then mounted it onto the flowers and top panel.  I finished it off with some tiny flat back white pearls.

I really enjoyed doing the colouring of these flowers.  I have also done a set of mauve flowers and another pink one, which I have coloured with a combination of alcohol markers and pencils, and will make these into cards as well.  

I have another set of Altenew stamps to have a go at next.  It is the peony scrolls stamp set, which I plan to have a go at water colouring.  And then there is the Vintage rose stamps I am trying to perfect ...Watch this space