Free background from VintageMadeForYou

Wednesday, 24 July 2013

Sympathy with roses

This is a Sympathy card I have made to keep in my stash.
I have used the Tied Together Couture creations embossing folder for the background and the central panel. I have put a dot of liquid pearls at each junction   The two side panels are done with the Marianne creatables Vintage Decoration die LR0269.  The centre is the Marianne Craftables Square and Stitch die CR1240. The roses I have made and the leaves are the Ash family punch.  
Finally the With Sympathy sentiment is the Elizabeth Craft Designs die which is cut out of silver mirror card, which looks a lot better in real life than shows in the photo.  


Wednesday, 10 July 2013

Christmas Cards already!


I have been making Christmas Cards for Fat Cats Card Corner

The first I used the new Marianne Craftables Square & Flower Stitch die CR1240 which I did in red mirror board and then the flowers and leaf dies as well from the same die set.  The flowers I cut 3 for each flower out of a pearlised light card, shaped the petals slightly and glued them on top of each other, alternating the petals on each layer.  Then put a green gem into the middle of each.

The background is embossed with the Cuttlebug Holly and Berries folder.  The music book is done with some music digital image, reduced and then printed on to a piece of card. It was then cut out with the Marianne Creatables Open book die LR0235.  Which I sponged around the outside with the Antique linen Distress ink and drew some gold gel pen onto the embossed parts of book pages

The sentiment is made with the Marianne Collectables Die and Stamp Banner and Text Christmas Set


The second one is a little bit different, I have tried to make it have a vintage look.

The vintage paper in the background was from Far Far Hill which has some wonderful free downloadable papers and elements.

I have used a vintage Christmas image from which is framed with the Square and Flower Stitch Marianne Craftables Die CR1240 with a paper heart doily behind it.  
The sentiment is done with the Marianne Collectables Banner and Text Christmas Stamp set.  
The poinsettieas are also a Marianne Creatables die LR0122, with the Holly Branches LR0244 behind them, and behind that is some antique cream lace.


The final card I wanted to use something other than a bauble die to make the Christmas bauble.  
So I used the Marianne Craftables Round Passe-partout  die CR1239 to cut out the circle, and then wove some red ribbon that has a gold edging onto another piece of card just bigger than the die cut, and attached it behind the circle.  I raised this piece of card up with sticky foam and mounted it onto some red card and then onto the white card.  I then put the narrow piece of ribbon up to the top for the hanger, and some Marianne Creatables   Holly Branches die LR0244 with some little red gem stickers on them for the berries.  A bow on top of that with the fine ribbon, and the sentiment at the top which is the Marianne Collectables Banner and Text Christmas Stamp set to finish the card


Paper flower display


Our local library has a 'Winter Craft' theme for its displays this month, and I did a display of paper flowers and cards in their display cabinet.  I wanted to just concentrate on cards, boxes and calendars that I had made with 3D flowers. There isn't anyone in my area who does this sort of flower making.  To fill in the gaps between the display peices, I  put some doilies, die cuts, and some of the materials you use in making this sort of card. I also put in a few of my boxes of pre-made flowers that I have in stock.  


I decided when I was getting everything gathered together to take to the library, I felt that there wasn't enough of other things I had made with the flowers, it was mainly cards or boxes, so I decided I would have a go at doing a small posy of the flowers in a teacup.  Teacups seem to be really 'in' at the moment, and I have always had an intention of doing a paper cup and saucer sometime.  Well I didn't have time to do that for this display, so I found a lovely tea cup and saucer set that I had from my Grandmother, so put it in that.


I think it is quite cute! In time I will have a go at making a paper cup and saucer, so that the entire thing is made of paper, but for now I am happy with this.

Tuesday, 28 May 2013

Anja Vintage decoration die cards

I have made two cards for Fat Cats Card Corner with the new Marianne Creatables Anja Vintage decoration die LR0269 .  

The first one I made was this one, with the two die cuts top and bottom that I have backed with Mauve card.  As you can see the front is a normal card and then I have extended the die cut above this on the back part.  


The front I have used one of the older Marianne Designables Swirl Cut and emboss folder,
and then on top of that I have put a flower image which I have edged with the Marianne Creatables Anja Ornaments 2 die on the side.  


The next one is one I have made with the same die, but this time I have backed it with a second die cut which fits onto each other perfectly.  


The middle I have used a pretty rose paper, and then have used the Marianne creatables Doily die Designer doily.  The vintage image of the girl has been framed with the Marianne Creatables Small Oval LR0235


The flowers are done with some bought daisies which I molded slightly and glued two together and then put a pearl in the middle.  


This is the how it looks when the flaps are closed and tied in a bow.
                                                                    

Lady with Yellow

I have done another card in the vintage style using a vintage photo image.  


This one I have used the Marianne Creatables Anja Corner die LR0200 at the top of the background, some ribbon and lace, and then some 7 gypsies design paper behind the vintage image.  


The flowers I have made with the 'My favourite Things' die called Mini Hybrid Heirloom Rose die, but I have only used the smallest of the two outside petals, which I have wet then scrunched up, then allowed them to dry out, before joining them together.  I then layered 3 of them for each flower, and finished them off with some yellow glitter stamens.  

I made a box for this to go into, and decorated the top cut away area with the Marianne Creatables  Anja Vintage Ornaments 2 die LR0270. 

Tuesday, 21 May 2013

Bella Wedding Card

I have made a wedding card with the Bella Bride digital stamp from Sassy Studio Designs.
I love this digi!

I made a box to go with the card, so that the flowers I have made didn't get squashed!


I have used one of the background papers that are free from Far Far Hill Freebies website.
I have used this on the box lid and the base of the card.  
I coloured Bella with aqua coloured pencils.  The border, corner and doily were all cut out on my Silhouette Cameo.   


The flowers, buds and leaves I have handmade.  
I also made the stick pin. 


Finally some pearls in the centre of some of the flowers, along the border and some lace to pretty it up and Viola!

Tuesday, 30 April 2013

Silhouette Cameo cards

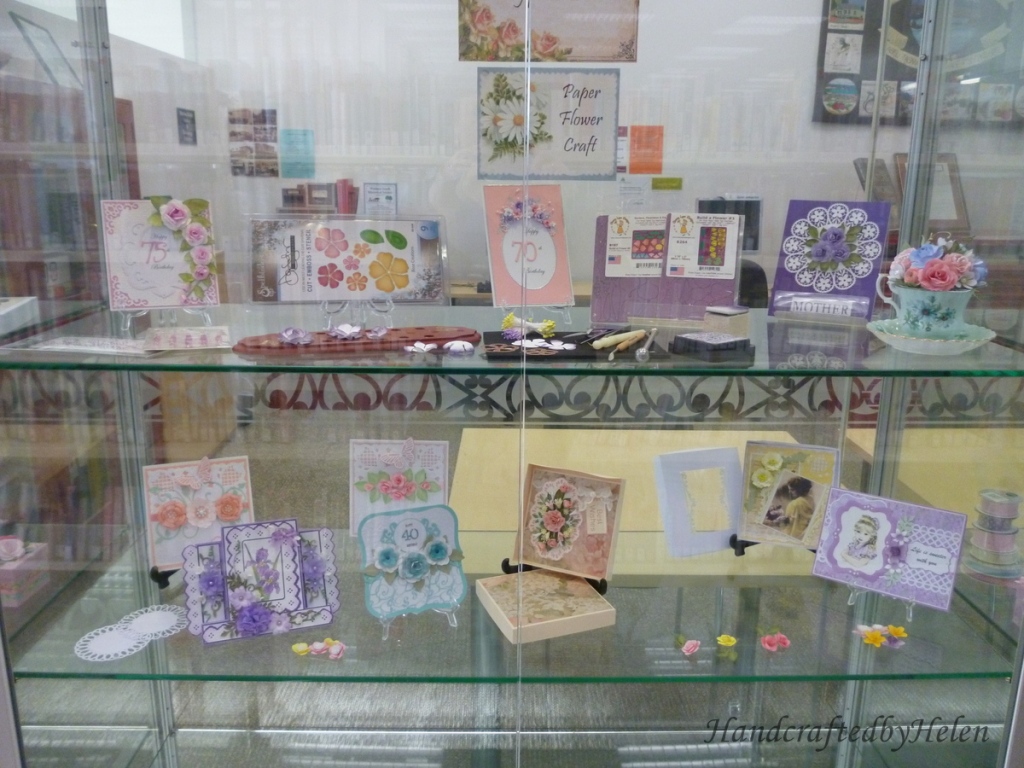
I have finally had some time to have more of a play with my Silhouette Cameo, trying to do some more intricate cutting with it.  I have made some cards with the results.

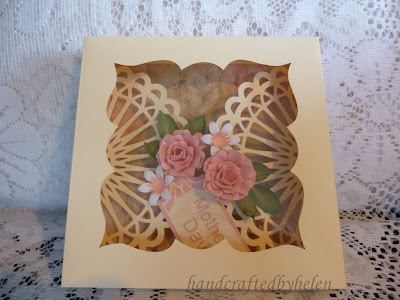
The first one is a card I have made for my Mum for Mother's Day.  


This one is one of the most intricate doilies I have done with the Cameo.  It is amazing!
The design is available at the Silhouette store.  


I decided because the doily was so intricate, I would keep the rest of the card quite simple.  
The flowers I have made with the Spellbinders Rose creation dies and the leaves I have used the Martha Stewart rose leaf punch which I have sponged with a couple of different green ink pads.  The sentiment I have cut out with the Cameo as well.  


The next card is also with a doily from the Silhouette Store.


I have backed the cream oval doily with a pink.  I have used a hydrangea and peony designer paper that I have had for quite a while in my stash, and I particularly like.  

The sentiment tag was also done with the Cameo


The roses and the Bell flowers have also been cut out with the cameo.  Again I have used the Martha Stewart rose leaf punch for the leaves and a ash leaves punch.  The daisies are also a tiny punch.  


This card I have just cut the corner with the Cameo


I have mounted it on some very pretty pearlised designer paper.  The rose I have done with the Spellbinder Rose creations die and the leaves again are the Martha Stewart leaf punch


This nest one is a Doily Gate card, another doily available from the Silhouette store.
I made the card up by cutting the doily image in half in the software, and welded them to a square that was the size I wanted the card.  Then it was cut out in one piece. 


 I then made a separate card that had the fold on the top, just very slightly narrower that the other part and attached the left over piece of the hydrangea and peony paper from the card earlier on the front of it and attached that to the back part of the gate part.  

Again the roses petal parts are cut out on the Cameo as is the sentiment tag.
I however had to glue the flowers and leaves along with the tab in a certain way, so that the gate card could still be opened, so that the inside part can be lifted up and written on the inside.  

I finally made up a box template on the Cameo software to put the card into.


My final card I have done the most with the Cameo.  
I created the doily frame in the software 


Also the Sentiment centre and scalloped backing were done with the Cameo
The main big pink flower, the white and pink pom pom flowers either side of it were also.  The other pink flower on top of the white bow and the tiny little pink flowers were also made with petals cut out with the Cameo.  


The image is Chrissy's Prom Digital Stamp from Sassy Studio Designs. I have coloured it with Water colour pencils.  The background paper is one of the wonderful freebies from Far Far Hill website.  
I have to say it is the first time I have made a stick pin to put in the flowers, I have seen them used on lots of cards, but have never had a go at making one.  I have to say I will need to look out for some better beads, I think you are better off having quite a range to make them with.